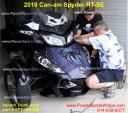
Spyder owners…. Here is a 2010 RT-SE with our “Venom” frunk wrap applied. This Can-am trunk wrap was applied by our customer Jay Nichols from Texas. He had some assistance as you can see from the pictures. We recommend that you have 2 people present to do the trunk decal kit application. We do have a number of application videos available for our Can-am Spyder trunk wraps and graphics kits.
JAYS COMMETNS:
The service was great, I was surprised at how big the sheet was once I opened the package. The quality of the graphic and material is excellent. The quality of the installers was marginal at best! I did suggest to my wife’s son that we are now experienced and should go into business. He less than politely declined.
I will say that the application video makes the job look a little easier than it really is for novices. The first side, we had all the excess sticking everywhere. It was like playing slap-jacks with an octopus. Now on top of that, Jonathan was trying to keep the applique off the surface by holding it almost vertical while I’m trying to press it down. That did not work. It worked much better when he allowed the material to lay down while I kept the dryer on it and used a swirling motion to press it in. (I didn’t have cotton gloves, but I did have a soft cotton cloth I used). Using overlapping swirling motions to press it in kept the bubbles and creases to a minimum (once my helper understood what he was supposed to do).
On the second side, in order to make Jonathan’s job easier, I trimmed the excess. And I ended up cutting a little too much at the upper left corner of the Trunk lid. We ended up cutting it straight across about 3 inches from the upper tip, and did that on the other side to make it even. Didn’t seem to detract from the visual, and I may use a 1/2 in reflective stripe to cover and blend the seam. I’ll see how it looks.


