Posted on Leave a comment

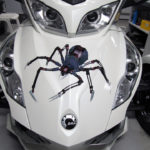
Mechanical Spider decal, Can-am Spyder RT, RS, RSS, GS models

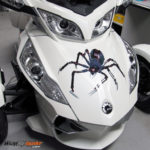
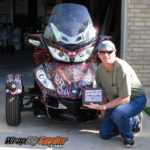
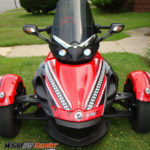
Special thanks to our customer for sending us the photos of his Can-Am Spyder RT with our Mechanical Spider decal kit applied.  This do it yourself vinyl decal applies easy with our E-Z apply vinyl film, just peel & stick.  We can size this mechanical spider decal to meet most customer needs or we can incorporate this element into a custom wrap just for you.  See our full line of Can-Am Spyder products here on our website.


Mechanical Spider mounted on Spyder RT
Enter the future with our Mechanical spider kit. It comes with 3 spiders in the kit.
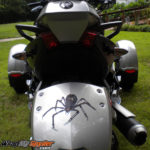
Mechanical spider frunk image
Enter the future with our Mechanical spider kit. It comes with 3 spiders in the kit.
Mechanical Spider on rear fender
Enhance your saddle bags with our Mechanical Spider decal
Posted on Leave a comment

Can-am Spyder custom advertising, Spyder lettering, Promotional graphics for Can-am Spyders

Do you need advertising for your  BRP Can-am Spyder?  We can help… This example was for one of our local Can-am dealers who will be using this Spyder for promotional use around our local area.  They were looking for something eye catching that tied into the colors of their existing logo.  They also asked that we incorporate some Advertising info off of BRP’s wesite regarding purchase of a Spyder along with website & other important information.  If you have a Spyder & are looking to do some advertising on it, contact us we can assist.  Our pre-cut frunk kits make this project easy to apply for most of our out of state customers or you can send us your parts & we can apply the graphics & send the pats back to you.  Let us know how we can assist…

Posted on Leave a comment

Can-am “Spyder Teeth” decal kit

This is a simple “how to” for the application of our “Spyder Teeth” decal kit for the front of a Can-am Spyder.

This is a little step-by-step on how to apply the Wrapmyspyder.com shark teeth to the Spyder RS. I picked design style #817 because I like the tongue design best. The normal two sizes available won’t work for the spoiler, so I had Pete print the design at 6″ x 20″, then I trimmed the red border from around the teeth, that puts it at just the right height for the application.

The leading edge of the two halves is curved and would leave the installation with bucked teeth <smile>, so I trimmed the front edge back, in a straight line from the front edge of the top tooth to the front edge of the bottom tooth. You could just leave one and then trim the second piece so there is an overlap, but I trimmed both pieces in my installation.

With all the trimming done, prep the spoiler by thoroughly cleaning the spoiler area, and wiping it down with 70% rubbing alcohol & standard paper towel off the roll, as recommended by Wrapmyspyder.com. Have your cotton gloves (add on at check out) , squeegee and blow dryer/heat gun at the ready.

Trim about 2″ of the backing off the leading edge. Placement of the first piece is critical because it determines how straight the teeth will be, you don’t want a crooked smile after all. So, don’t be afraid to remove and reapply until you get it completely straight. Of course, you are going to start from the center of the spoiler, and work your way around. There are a few contours to work around, so use your squeegee and gloves and remove the backing as you go. If you need to pull it back and reapply, do it, use the backing as necessary.

Take your time and get it on right, after that, the application of the second piece is a breeze. The teeth will overlap onto the small trim pieces where the spoiler ends. I applied it straight across and then sliced it to allow them to separate. After you’ve completed the installation, remember to heat the shark teeth up with your blow dryer / heat gun to activate the adhesive for permanent bond.

Order the  “Spyder Teeth” here.     See our full line of Can-am products here.

Phone: 814-838-6377
Posted on Leave a comment

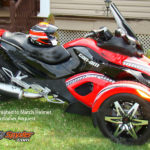
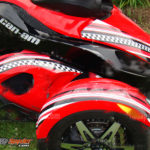
Can-Am Spyder RSS Racing Checkers Graphics Kit

How about this Spyder RSS?  Our customer Jeff M. contacted us with his idea of creating a graphics kit for his Spyder that matched his Arai helmet. We told him to send us some photos of the helmet & we will see what we can do.   After taking a look we expressed that we can do the project based on the helmet design.  Jeff did not want to cover all the parts but just select sections of the Spdyer.

After making a few edits to his design proofs with Jeff’s direction we had the look he wanted.  We even created a custom front  nose piece just for him & we added a one off RSS logo as well.  Hope you like it… If you have a Can-am Spyder & have a graphics idea contact us… we can help.  See our full line of Spyder Trunk (frunk) wraps & multi Piece kits.  We also have a complete line of custom wraps shop our HUGE store.

Order your Racing Checkers Kit here.

Posted on 1 Comment

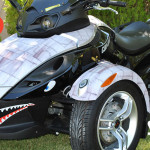
Can-Am Spyder wrap, decals, graphics, P40 Shark face, warhawk effect

Wow Steve…. your Spyder looks totally amazing!  Steve purchased our Dirty Air Craft Metal 24 Piece graphics kit for his Can-Am Spyder.  To finish the look off Steve requested we resize our Shark Face element so he could apply it on his front air dam & wow talk about finishing the look!!  Imagine the looks he must get as he drives his Spyder around town… If you have a BRP Can-Am Spyder & you are looking to turn some heads, we can help.  Contact us with your custom request & we will do our best to assist. To see our full line of Can-Am products use this link.  To order our Shark Face Element use this link or contact us for a custom size.

Steve Said: Hey Pete!!!  I just got the parts back and all I can say is WOW!!!  I am very pleased and very grateful!!  Wow… it is awesome you guys are the best Pete!   I’ll get some pics out to you and on Facebook, etc.    Anyway, looking forward to sending you some pictures of it… and even more to driving it around sporting my new Powersportswrap finish!!!!  Wooop wooop!!! LOL.  Take care and my best to you, your family and your crew there at Powersportswrap.com!!!!

Steve